Pocket Pad v3 adds support for a new Pocket Pad Cloud feature which enables Pocket Pad devices to be setup in the cloud.
As long as the Pocket Pad device and the venue both have internet connectivity, Pocket Pad can be used anywhere and does not need to be on the same physical network or location as the venue that it is connecting to.
Pocket Pad cloud can be utilised in environments such as off-site mobile food service.
To configure and use Pocket Pad Cloud, complete the steps outlined below.
The following links can be used to skip to a specific section of the Pocket Pad Cloud setup process:
The Idealpos Scheduler needs to be installed and configured.
It can be installed on any PC that is on the same network as the POS Terminal and POS Server.
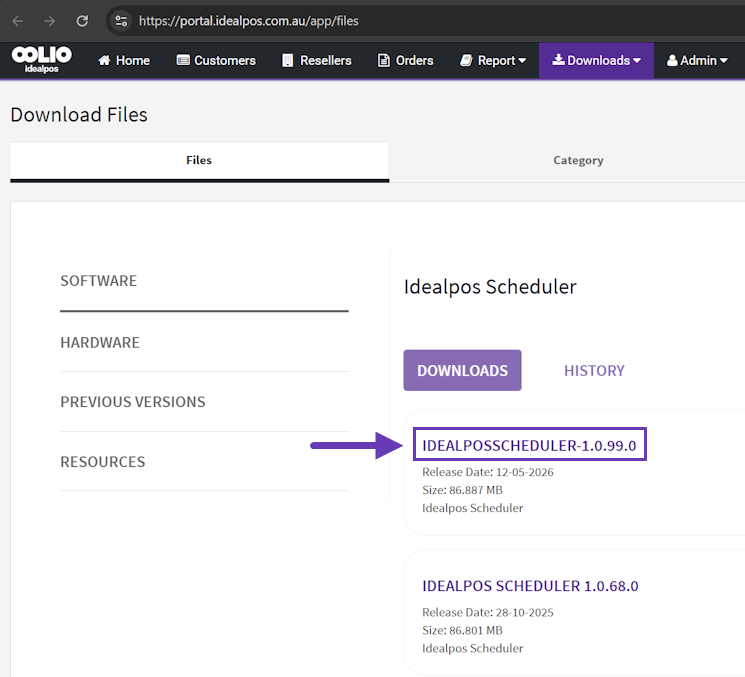
To install the Idealpos Scheduler, source the installation file from the Idealpos Portal.
Go to: https://portal.idealpos.com.au > select Downloads > Files > Software > Idealpos Scheduler > Download the latest version available.
After the Idealpos Scheduler has been downloaded, double click on the installation file to install it.
There is no user input required during installation (other than accepting any Windows User Account Control prompts).
A new site needs to be added in the Idealpos Service Portal.
Go to: https://portal.idealpos.com.au
Login > Select Customers > Search/Select the Customer > Press the "Customer Support" button.
Under the "Pocket Pad Cloud" heading, press "Add Site".
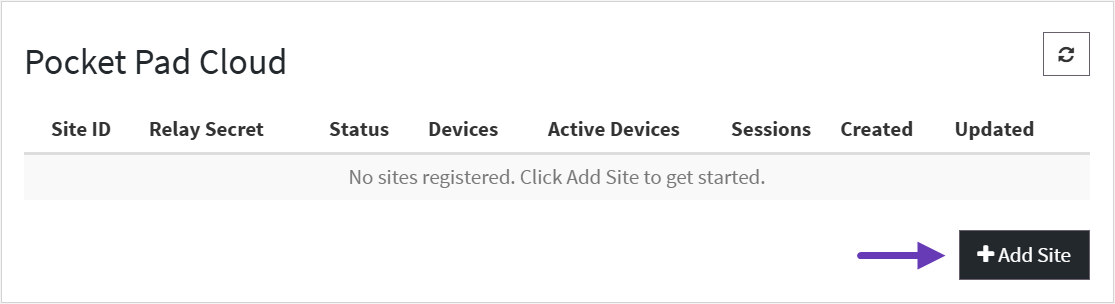
The following will be displayed:
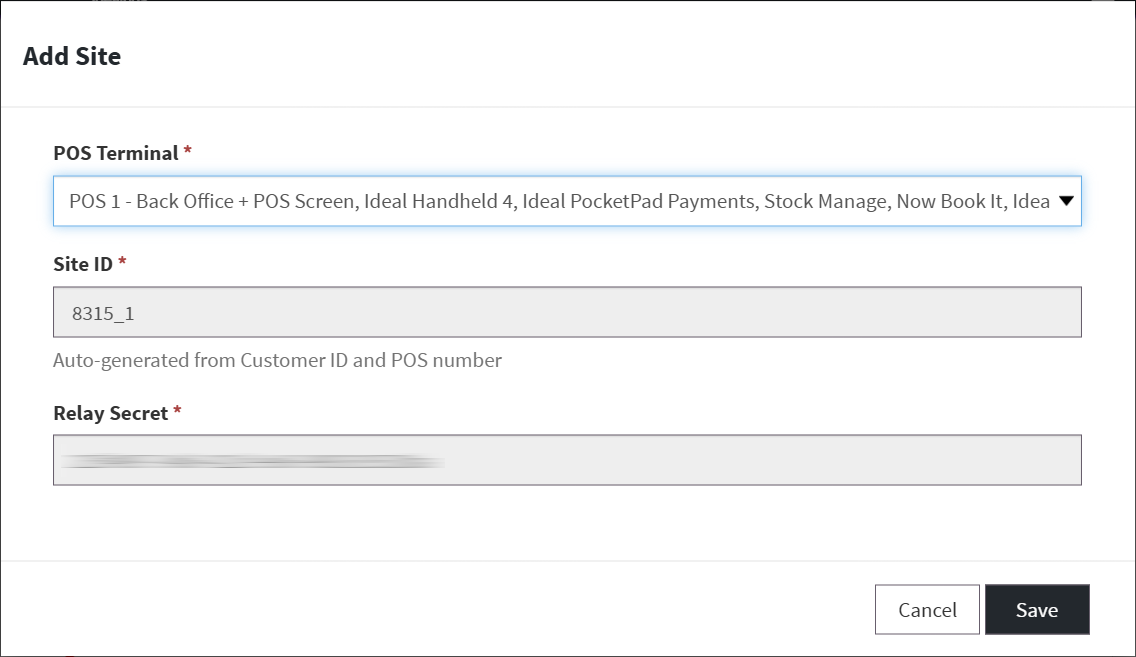
After pressing "Save", a new Site will appear.
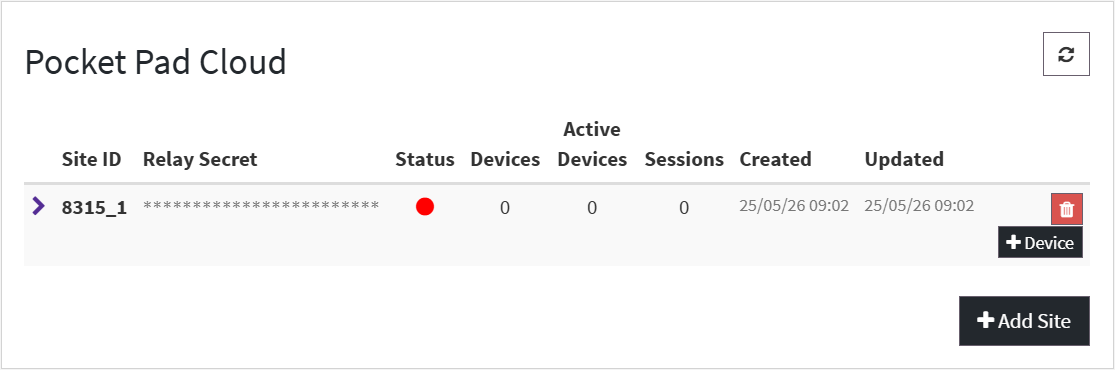
Leave the above page open as it will be required to pair the Idealpos Scheduler and Pocket Pad devices.
Run the IdealposSchedulerSettings.exe from one of the following locations:
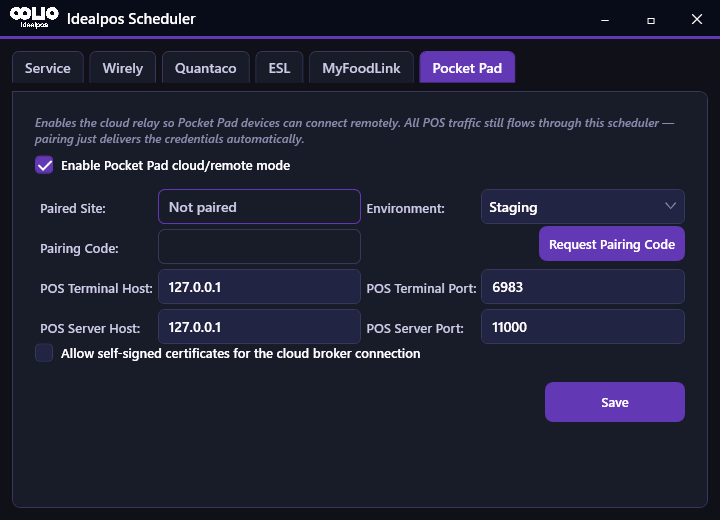
Within the Idealpos Scheduler Settings window, select the "Pocket Pad" tab and configure as follows:
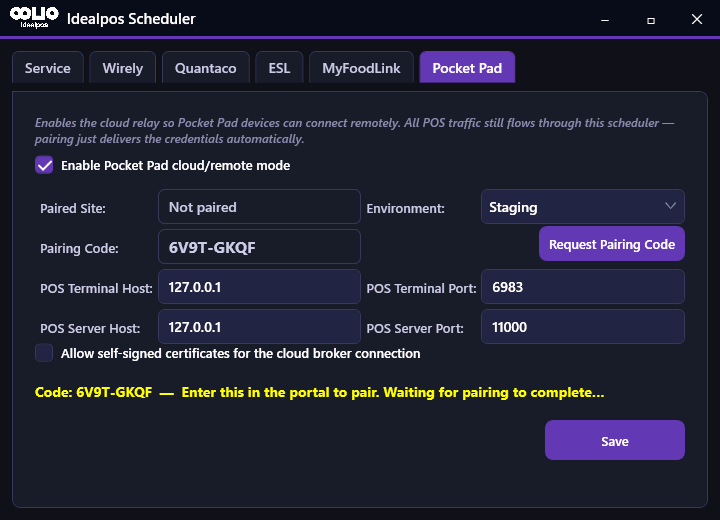
After pressing the Request Pairing Code button, the Pairing Code field will display a value.
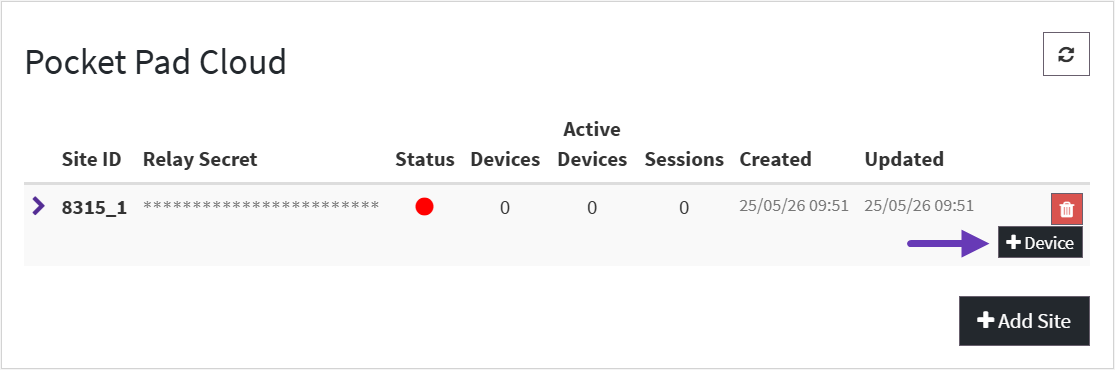
In the Idealpos Service Portal, press the "+ Device" button.
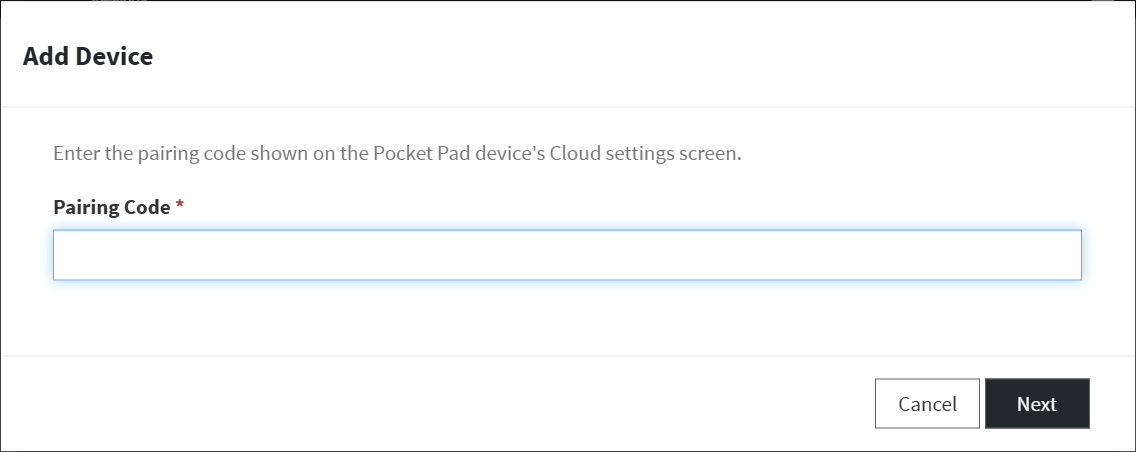
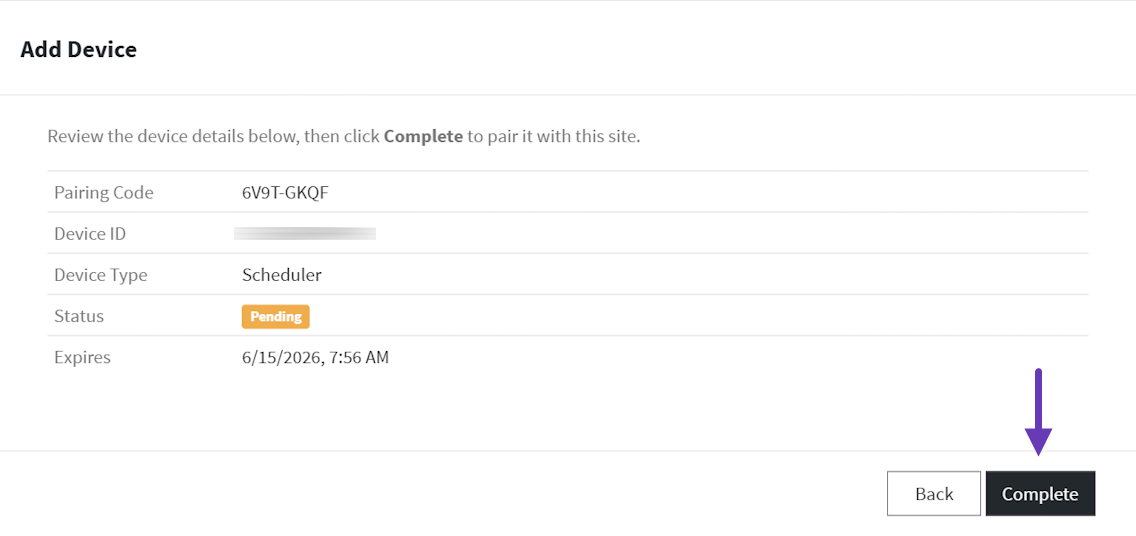
An "Add Device" prompt will be displayed.
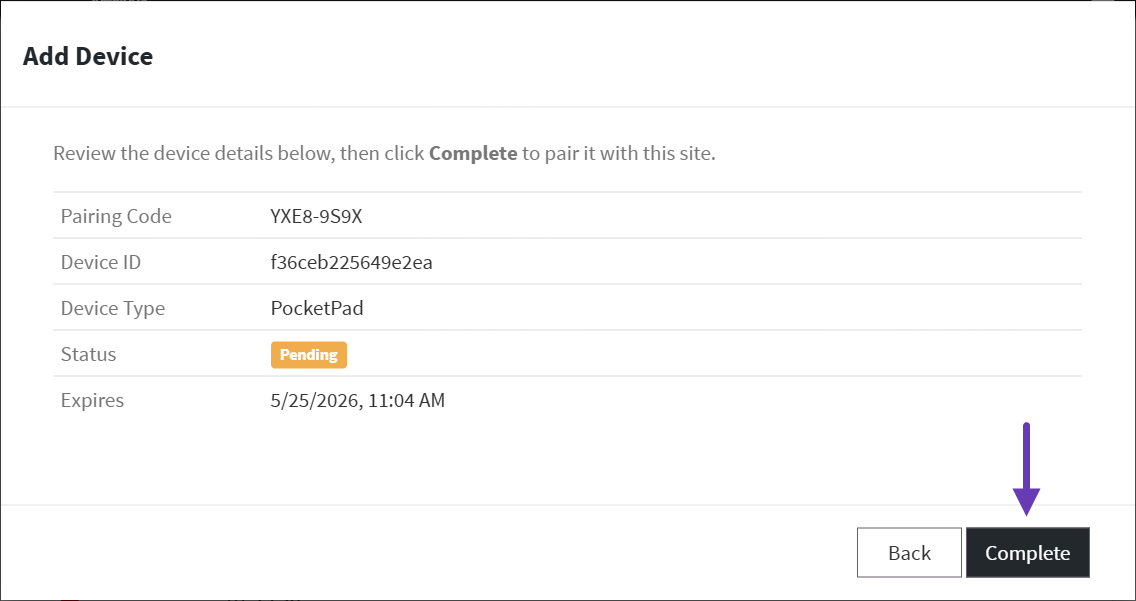
The site will display a prompt to review the device details.
Press the "Complete" button to finalise the pairing process.
After the Idealpos Scheduler has been paired, it will display a prompt to "Restart the Idealpos Scheduler service to apply".
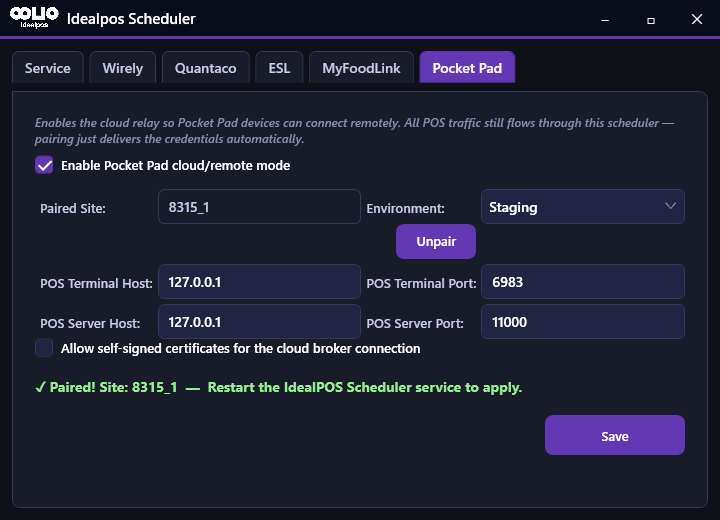
Press the "Save" button to save the paired details.
The Idealpos Scheduler will prompt to restart the Idealpos Scheduler Service to apply.
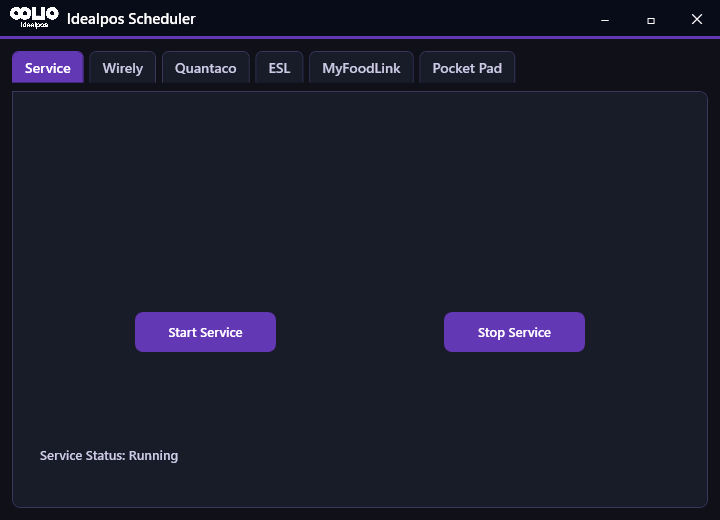
Go to: Service tab.
Press the "Stop Service" button - a "Service stopped successfully" prompt will appear > press OK.
Press the "Start Service" button - a "Service started successfully" prompt will appear > press OK.
After the above has been configured, the Idealpos Portal - Pocket Pad Cloud will show a green status indicator which indicates that the Idealpos Scheduler is successfully connected using the entered credentials.
If the Status indicator is red, press the refresh button in the Idealpos Service Portal which should trigger the Status indicator to change to green.
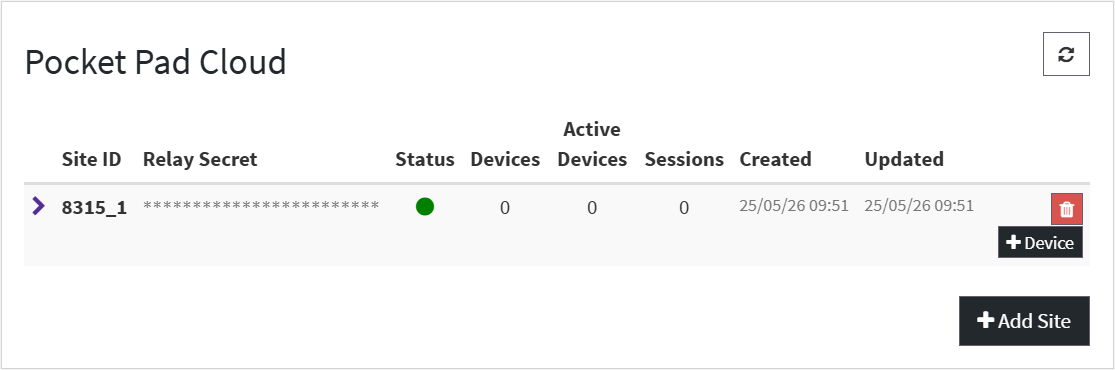
To pair a Pocket Pad device with Pocket Pad Cloud, go to:
https://portal.idealpos.com.au > Login > Select Customers > Search/Select the Customer > Press the "Customer Support" button.
Under the "Pocket Pad Cloud" section, press the "+ Device" button
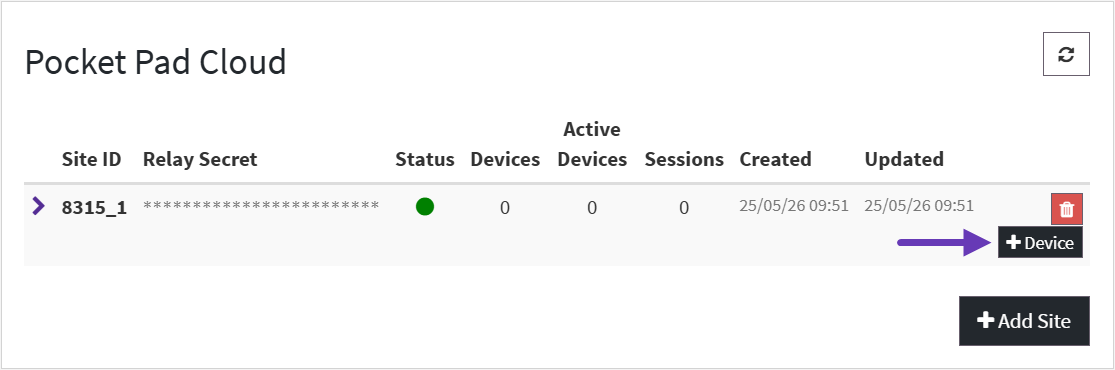
An "Add Device" prompt will be displayed.
In the Pocket Pad app, go to: Settings > Enter Password > Pocket Pad Cloud.
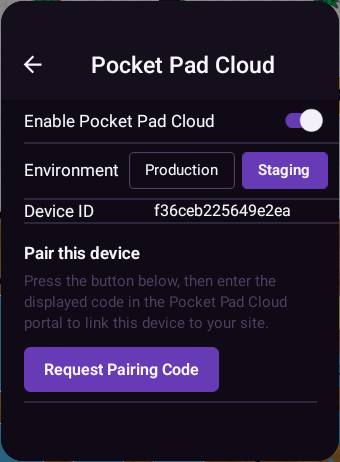
After pressing the "Request Pairing Code" button, the app will display a pairing code.
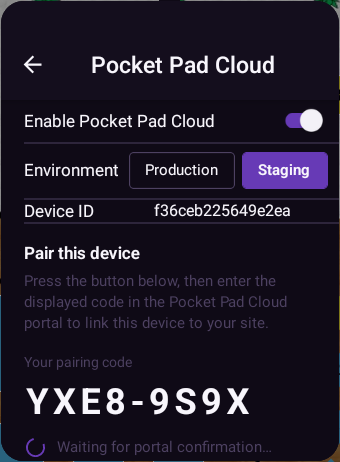
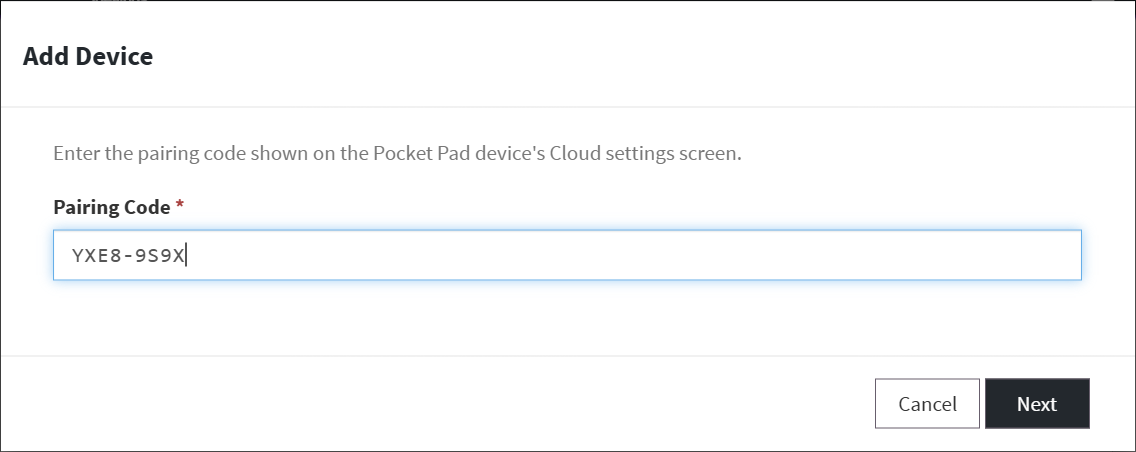
Enter the displayed Pairing Code into the Pairing Code prompt shown in the Idealpos Service Portal, then press "Next".
The site will display a prompt to review the device details.
Press the "Complete" button to finalise the pairing process.
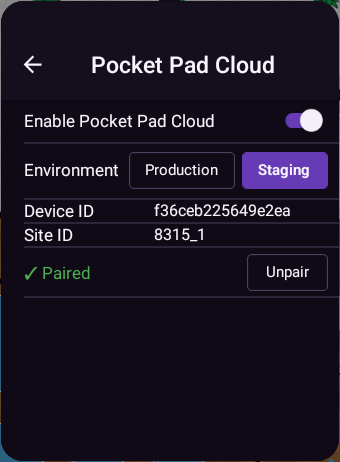
The app will now show "Paired".
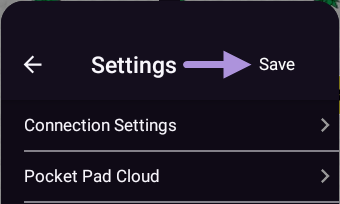
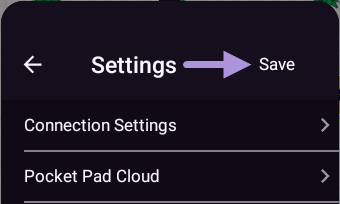
To save the Pocket Pad Cloud paired state, press the back button, then press "Save".
Note!
When configuring Pocket Pad Cloud, ensure that the Enable Connection option in the Pocket Pad app Connection Settings is DISABLED.
Also note that the Connection Settings (Handheld Licence IP, POS Server IP and Server Port) are not required and can be left as blank when using Pocket Pad Cloud.
These settings will be handled by the Idealpos Scheduler.
To unpair a Pocket Pad app/device from Pocket Pad Cloud, within the Pocket Pad app, select Settings > Enter Password > Pocket Pad Cloud > Unpair.
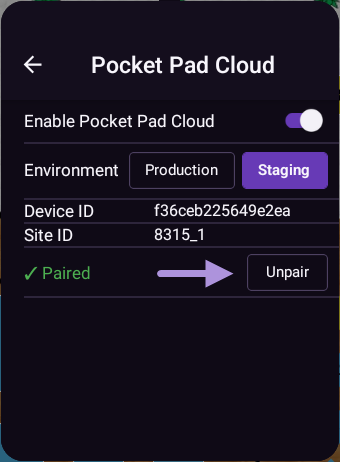
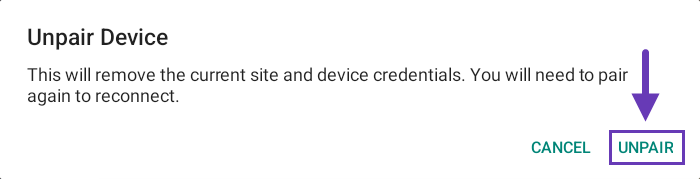
A confirmation prompt is displayed "This will remove the current site and device credentials. You will need to pair again to reconnect".
Press the "Unpair" button to continue with unpairing, or press Cancel to go back without changes.
The pairing status will be cleared.
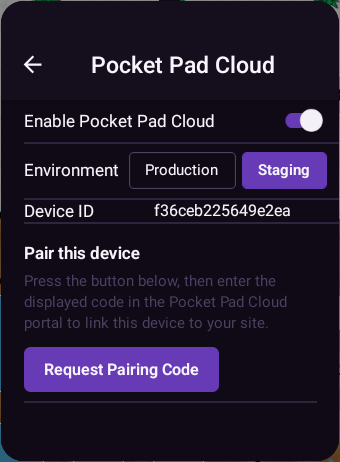
To save the change, press the back button then press "Save".
Failing to save the change will result in the device keeping its paired status.
Go to: https://portal.idealpos.com.au > Login > Select Customers > Search/Select the Customer > Press the "Customer Support" button.
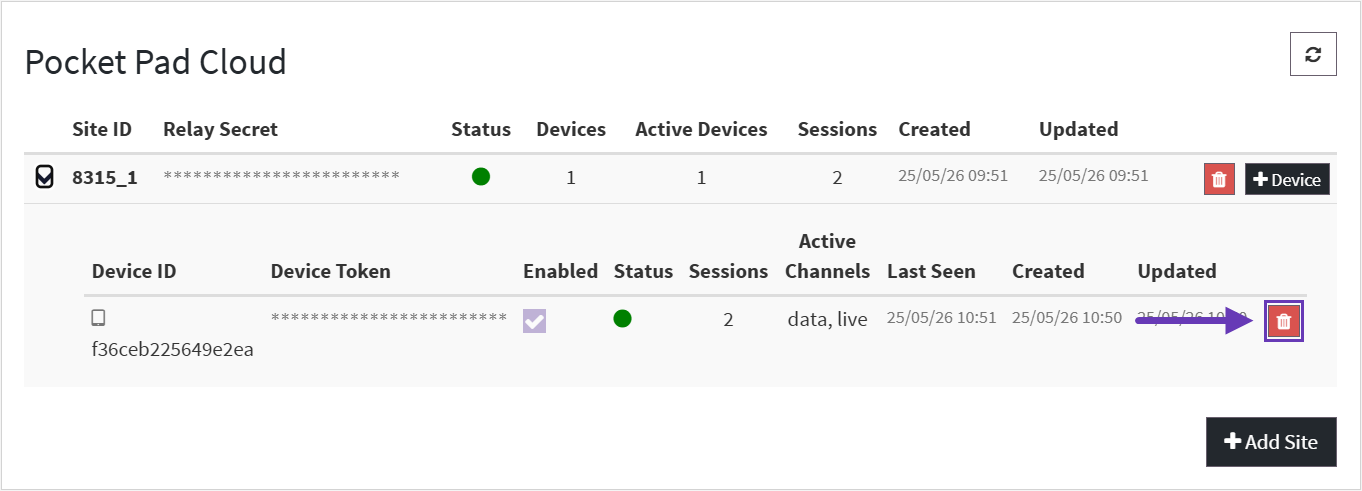
Under the "Pocket Pad Cloud" section, expand the site by pressing the ">" button.
A list of Paired Devices will be shown.
Press the rubbish bin icon next to the device to delete.
Note that deleting any devices which are still paired will result in those devices having their connections terminated immediately.
If a device is deleted accidentally, it will need to be paired again using the pairing process outlined above.
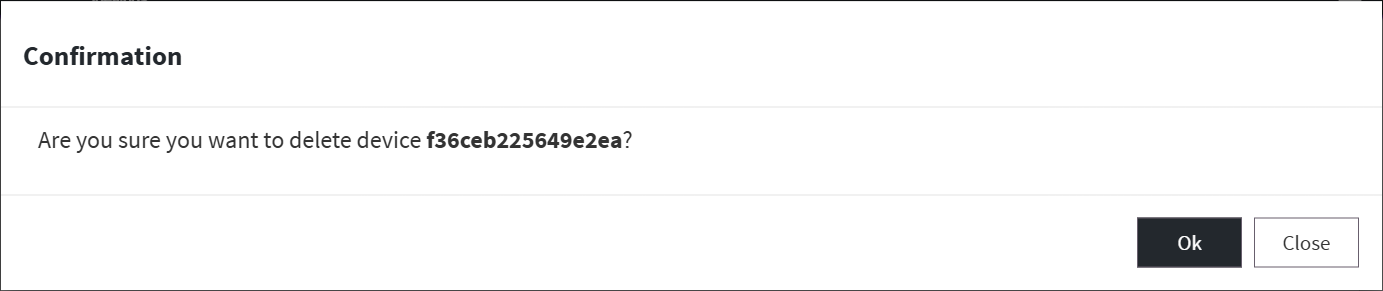
A confirmation prompt will be displayed "Are you sure you want to delete device [Device ID]?"
Press "OK" to confirm.
The Idealpos Service Portal will show a "Device deleted successfully" prompt.
Any Pocket Pad Cloud connections from the deleted device will be terminated immediately.